Wednesday, June 5, 2013

Coconut Macaroons (#Eggless)


Have you ever got into a situation where you were flipping through a recipe book and your eyes struck on a recipe which is perfect for the season, involves the use of bare minimum ingredients you already have in your pantry and is super quick. What would you do? 

Would you still flag a post-it on the recipe to fall under "to-make" list or would you go to the kitchen and start preparing for the recipe? What did you say? You want to start preparing for the recipe...Yeah, that's what I did! And see in less than half an hour I have my first batch of these coconut macaroons out of the oven. Its Yummmm.... still warm from the oven, crisp on the outside and perfectly chewy on the inside and the coco-nutty smell. Ahhh! Nothing can beat this.


All this needs is just 4 ingredients. Yeah, you heard me correct, just 4. The good part is no butter... I don't even feel guilty after having 4 cookies by the time I write this part of my post and the second batch is still in the oven.

Hey, where are you planning to go? What...you also heading to the kitchen to make these cookies. Atleast wait to see all the ingredients.

Here's what you would need to make these Eggless Coconut Macaroons:-

Makes: 24 cookies

1/3 cup/ 40 gms all purpose flour
1/4 tsp salt
3 cups/ 225 gms unsweetened shredded coconut
3/4 cup/ 170 ml sweet condensed milk

Here's how you could make it:

Preheat your oven to 180°C (350ºF). Line two baking sheets with parchment paper or grease them with butter.
  • In a bowl, sift all purpose flour and salt and whisk it.
  • Add shredded coconut and whisk them until it gets mixed properly into flour and salt.
  • Add condensed milk and whisk it until it becomes a thick paste. That's it, we're done!
  • Using 2 tablespoons, drop the cookies into baking sheet keeping a gap of 2 inches between each cookie.
  • Bake for about 15-18 minutes until the cookies turn golden from the sides.
  • Let it cook completely on the baking sheet placed on a wire rack. 
Variation:-
Temper the chocolate. Drizzle the melted chocolate over the cookies making zig zag pattern or simply dip the cookies in chocolate and place them on the parchment paper to cool.Enjoy the chocolate coconut macaroons.


Hope you would also enjoy making these cookies as much as I did!

Happy Baking.

Saturday, June 1, 2013

ANZAC Cookies

Sometimes the simplest of things give you the most pleasures in life! That's how I felt when I had the first bite of freshly baked still warm ANZAC Biscuits. It was love at first bite! I made these cookies as yet another baking experiment in my kitchen of the 'eggless' and 'pick me up anytime' category. The texture of these biscuits (cookies) is crunchy on the outside and chewy inside. 


An Anzac biscuit is a sweet biscuit popular in Australia and New Zealand made using rolled oats, flour, desiccated coconut, sugar, butter, golden syrup, baking soda and boiling water. As a history, ANZAC biscuits have been associated with the Australian and New Zealand Army Corps (ANZAC) , established during World War I. It has been claimed the biscuits were sent by Army wives to soldiers abroad because the ingredients do not spoil easily and the biscuits kept well during naval transportation. 

One notable omission from any Anzac biscuit recipe is eggs because of the scarcity of eggs during the First World War (as most poultry farmers joined the war) and also so that the biscuits would not spoil when shipped long distances. Check the Wikipedia page here for more details on ANZAC biscuits.

For me, these biscuits represent the love and affection of the Army wives for their husbands. I packed my love and affection for my brothers and sister snd sent these biscuits tn Indore and I was delighted to know that they were finished the day they reached them. 

So, without taking much of your time, lets get straight to baking.

Here's what you would need to make these ANZAC biscuits:-

Makes 28 cookies

1 cup/ 90 gms rolled oats
1 cup/ 130 gms all-purpose flour
⅓ cup/ 150 gms caster sugar
¾ cup/ 60 gms  desiccated coconut
2 tbsps golden syrup ( I substituted corn syrup for golden syrup)
1/2 cup/ 115 gms butter
1 tsp baking soda
2 tbsps hot water

Here's how you can make these biscuits-

Preheat oven to 160°C (320ºF). Line 2 baking sheets with parchment paper and keep it aside.
  • Mix the oats, flour, sugar and coconut in a bowl. 
  • Place the golden syrup (corn syrup) and butter in a saucepan over low heat and melt. 
  • Mix the baking soda with the water and add to the butter mixture. 
  • Add to the dry ingredients and mix well. 
  • Using a ice-cream scoop or with the help of two tablespoons place the mixture on to the  baking tray, leaving space between each one for spreading and flatten slightly with the help of your finger tips. 
  • Bake for 8–10 minutes or until the cookies are deep brown on the sides. 
  • Cool on trays for 5 minutes, then transfer to wire racks to cool completely. 
These cookies can be stored for a long time(more than a week).

Variations:-

Sandwich one scoop of vanilla ice-cream with two ANZAC biscuits and you are good to go for a perfect dessert!

I hope you would also enjoy making these biscuits as much as I did!

Happy Baking!

Monday, May 27, 2013

Swedish Prinsesstarta - Princess Cake (# Daring Bakers May 2013 Challenge)

This is my first participation at Daring Bakers Challenge. I have been trying to participate for a long while now but something was pushing me back. Somewhere in my mind, I had the feeling that Daring Bakers Challenge was attempted by only the genius and the great bloggers and I, a new baker with my new small blog, doesn't fit into the role. 
But looking at this month's Challenge hosted by Korena from Korena in the Kitchen who challenged everyone to make a Swedish Prinsesstårta, I couldn't help but think why not give this cake a try. And I decided to dedicate this to my Princess, my Sweet little sister Shruti, who celebrated her 24th birthday this month. And to top the happiness, she got selected in her Pre-PG Exam and will now be getting entrance in Collage to be Super Specialized Dentist.

A Princess Cake (Prinsesstårta in Swedish) is a traditional Swedish cake consisting of alternating layers of airy sponge cake, whipped cream, and thick pastry cream, all topped with a 2–3 mm thick layer of marzipan. Although the texture is slightly different, the flavor is very similar to that of angel food cake, and the marzipan and whipped cream (along with the heavy, cream-based frosting) is highly comparable to a buttercream in both texture and flavor.


A little research revealed that the original recipe was created in the 1930s by a Swedish home economics teacher named Jenny Åkerström, who taught the three Swedish princesses of the time. She published a series of four cookbooks called “The Princess Cookbooks” and in one of the editions, there was a recipe for “Grön Tårta” (green cake). One story is that this later became known as “princess cake” (Prinsesstårta) because the three princesses are said to have loved it so much. Another story is that Ms. Åkerström actually created three very elaborate “princess cake” recipes – a different one for each princess – and that the current version is a simplified combination of all three. That explains the princess connection, but the reason for the cake being green still seems to be a mystery. Today, Prinsesstårta is popular in Finland as well as Sweden – so much so that the third week in September is officially Prinsesstårta Week!


At first the Challenge looked difficulty as it needed a lot of things to be prepared in a short duration as I saw the Challenge only in the last week (May 24th). I had all the ingredients at hand and decided to make this Princess Cake from scratch. I prepared the pastry cream, sponge cake, marzipan on May 25th and kept everything in the refrigerator to assemble the cake the next day i.e. on Sunday. But to my dismay, I discovered the cake I baked was not properly baked from the center and it could not be used to cut into 3 slices. :(

The next day I had someone visiting at home and could not bake another cake until night. Thats when I baked the cake, whipped the cream and tried to assemble the cake in a hot and humid May mid-night and in the room with no Air Conditioner. There were a lot of challenges in finishing this cake but at the end I am glad I could finish it and it tasted awesome! This cake might not be the best looking cake I have ever made but this is definitely one of the best tasting cake that I have made. 

I apologies for the poor quality pics as the battery of my camera was over and I had to click all the pictures with my Samsung Galaxy Note II. Here's some pics of the the Prinsesstårta in the making-


I would like to thank Korena once again for putting up the challenge to make this sweet and beautiful Princess Cake!


Here what you would need to make this Princess Cake:-

Marzipan
Sponge Cake
Whipped Cream
Pastry Cream
Sponge Cake
Whipped Cream
Pastry Cream
Raspberry Jam
Sponge Cake


1 Sponge Cake (recipe below)
1 cup/ 240 ml pastry cream (recipe below)
1 cut ripened mango
2 cups/ 500 gms heavy whipping cream (I used Rich's non dairy cream)
300 gms Marzipan (recipe below)
Yellow, Red and Green food colouring
Icing sugar/ corn flour for rolling

Sponge Cake
Fine dry bread crumbs for the pan 
4 large eggs, at room temperature
1 cup/ 200 gms caster sugar
1 tsp pure vanilla extract
1/2 cup/ 70 gms all purpose flour
1/2 cup/ 65 gms corn flour/ corstarch
1 tsp baking powder
1/8 tsp salt

Pastry Cream
Recipe adapted from Le Cordon Bleu London
1 1/4 cups (300 ml) milk (whole or 2%)
1 tsp pure vanilla extract
3 large egg yolks
1/4 cup/ 50 gms granulated white sugar
2 tbsp all-purpose flour
2 tbsp cornstarch (corn flour)

Eggless Marzipan
Recipe adapted from Cake Central
1 cup/ 115 gms Homemade Almond Flour
1 cup/ 225 gms icing sugar
1/4 cup/ 60 ml. corn syrup
1/2 tsp almond extract
1 tbsp lemon juice/ water or rum

Here how you can make the Swedish Prinsesstarta:

Sponge Cake
Preheat the oven to 350°F/180°C. Line the bottom of a 9 inch spring form cake tin with parchment paper then butter the paper and sides of the pan. Dust the buttered pan with bread crumbs to coat the sides and bottom of the pan. Set aside.

  • In the bowl of your stand mixer or hand mixer, place all four eggs and sugar and beat on a medium high speed for about 5  minutes until the eggs tripled in volume, fluffy and light pale yellow in colour. The mixture will fall from the beater in thick ribbon.
  • Add vanilla extract and beat it to incorporate in the egg mixture.
  • In another bowl, sift all the dry ingredients i.e. all purpose flour, corn flour, baking powder and salt and whisk it together.
  • Add the dry ingredients into the egg mixture and fold it in with the help of the rubber spatula by cutting in the centre and folding it in just until the flour is completely incorporated into the batter. Do not over mix the batter. 
  • Pour the batter into the prepared cake tin and bake for about 40 minutes. The cake is done when the top of the cake is spongy to the touch and a tooth pick inserted in the center comes out with few moist crumbs.
  • Let the cake cool in the pan for a few minutes then run a knife around the edges and remove the cake from the pan and let it cool completely on a wire rack. Do not worry if the cake sinks a bit from the center.
  • Once cooled completely, cover the cooled cake with a cling film and freeze it in the freezer until further use.

Pastry Cream

  • In a small bowl whisk the egg yolks and sugar until sugar completely dissolves. Add the corn flour and all purpose flour and whisk it to incorporate in the egg mixture until it becomes a smooth paste.
  • In a big heat proof bowl, keep the milk to boil. (just until the milk start to forming up)
  • Remove the milk from heat and add slowly in the egg mixture while continuously whisking the egg mixture otherwise the eggs will scramble! 
  • Pour the egg mixture back into the bowl which had milk boiling and cook over medium heat until boiling whisking continuously. Once the egg mixture starts to thicken (after 30-40 seconds), remove from heat and quickly add the vanilla extract and stir.
  • Pour the cream into a clean bowl and place a plastic wrap on the top layer of the cream to avoid forming of a skin.
  • Let it cool completely on room temperature. Freeze the  cream in the refrigerator for 2-3 days if not using immediately.
  • Stir before using the cream to get rid of any lumps that may have formed.
Marzipan
  • Place the almond flour and icing sugar in the bowl of your food processor and pulse it to remove any lumps that may have formed.
  • Add corn syrup and almond extract and pulse again to combine. The mixture should still be quite dry and crumbly and would not have a doughy consistency.
  • With the food processor running on a slow speed, add the lemon juice just until the mixture starts to clump together. (I missed this part, and added the entire 1 tbsp lemon juice and got a sticky marzipan. I had to add a lot of icing sugar to make it come to a workable condition while rolling)
  • Scrap the mixture onto your kitchen top and knead it to form a dough ball. Wrap the dough with a cling film and rest it in the refrigerator over night to let the flavours merge completely.
Here's how you can Assemble the beautiful Princess Cake:
  • Whip the cream (I used Rich's non dairy cream) until stiff peaks before assembling the cake. Keep the cream in the refrigerator until use.
  • With a long serrated knife and working very softly, slice the sponge cake into three equal layers. Use a spatula to help you lift out each layer of the sponge cake once you cut it. Set aside the middle layer as this will become the top layer of the cake which will give the cake the dome shape as this layer is most flexible and fragile and very easy to bend.
  • Place the bottom layer of the cake onto the serving plate or cake board and spread the raspberry jam evenly on the layer. 
  • Spread half of the chilled pastry cream over the jam in an even layer keeping 1 inch gap from the sides of the cake so that the pastry cream won't spill over the sides of the cake
  • Spread the cut mangoes evenly onto the layer of pastry cream and cover the mangoes with a thick layer of whipped cream. 
  • Top the whipped cream with another layer of the cake. Spread the remaining pastry cream evenly over it again keeping some space around the edges.
  • Reserve 1/2 cup of the whipped cream separate and pile the rest of the stiffly whipped cream to make a dome shape covering the sides of the cake.
  • Place the final layer of the sponge cake (the one set aside earlier - the most fragile middle layer) and cover the cake with the remaining whipped cream making the dome look as perfect as you can. Refrigerate the cake to firm up while you continue with the next step. Considering the hot weather I had kept the cake in the freezer.
  • Colour a small  piece from the marzipan into a pink colour to form rose and another small piece into green colour to form leaves. Colour the remaining marzipan with yellow colour. I chose these colour to compliment the season and the mangoes I had put in the cake earlier. 
  • Spread the kitchen top and rolling pin with lots of icing sugar or corn flour and press the marzipan into a disc and rolling it out to a 14 inch circle with 1/8 inch thickness. Use plenty of icing sugar on both sides of the marzipan and roll it with your hands to avoid sticking onto the kitchen top. Thankfully, I had worked with a fondant cake earlier which made my job of rolling the marzipan bit easy but the hot weather made this job very tough. 
  • Use the rolling pin to drape the rolled marzipan sheet over the cake and smooth it around gently with the help of your hands. I loved the smoothening part of assembling this cake. Trim the excess with a paring knife 
  • Decorate the top of the cake with marzipan roses and leaves.
This one's for you - Shruti!

I hope you would also enjoy making this cake as much as I did!

Happy Baking.

Thursday, May 23, 2013

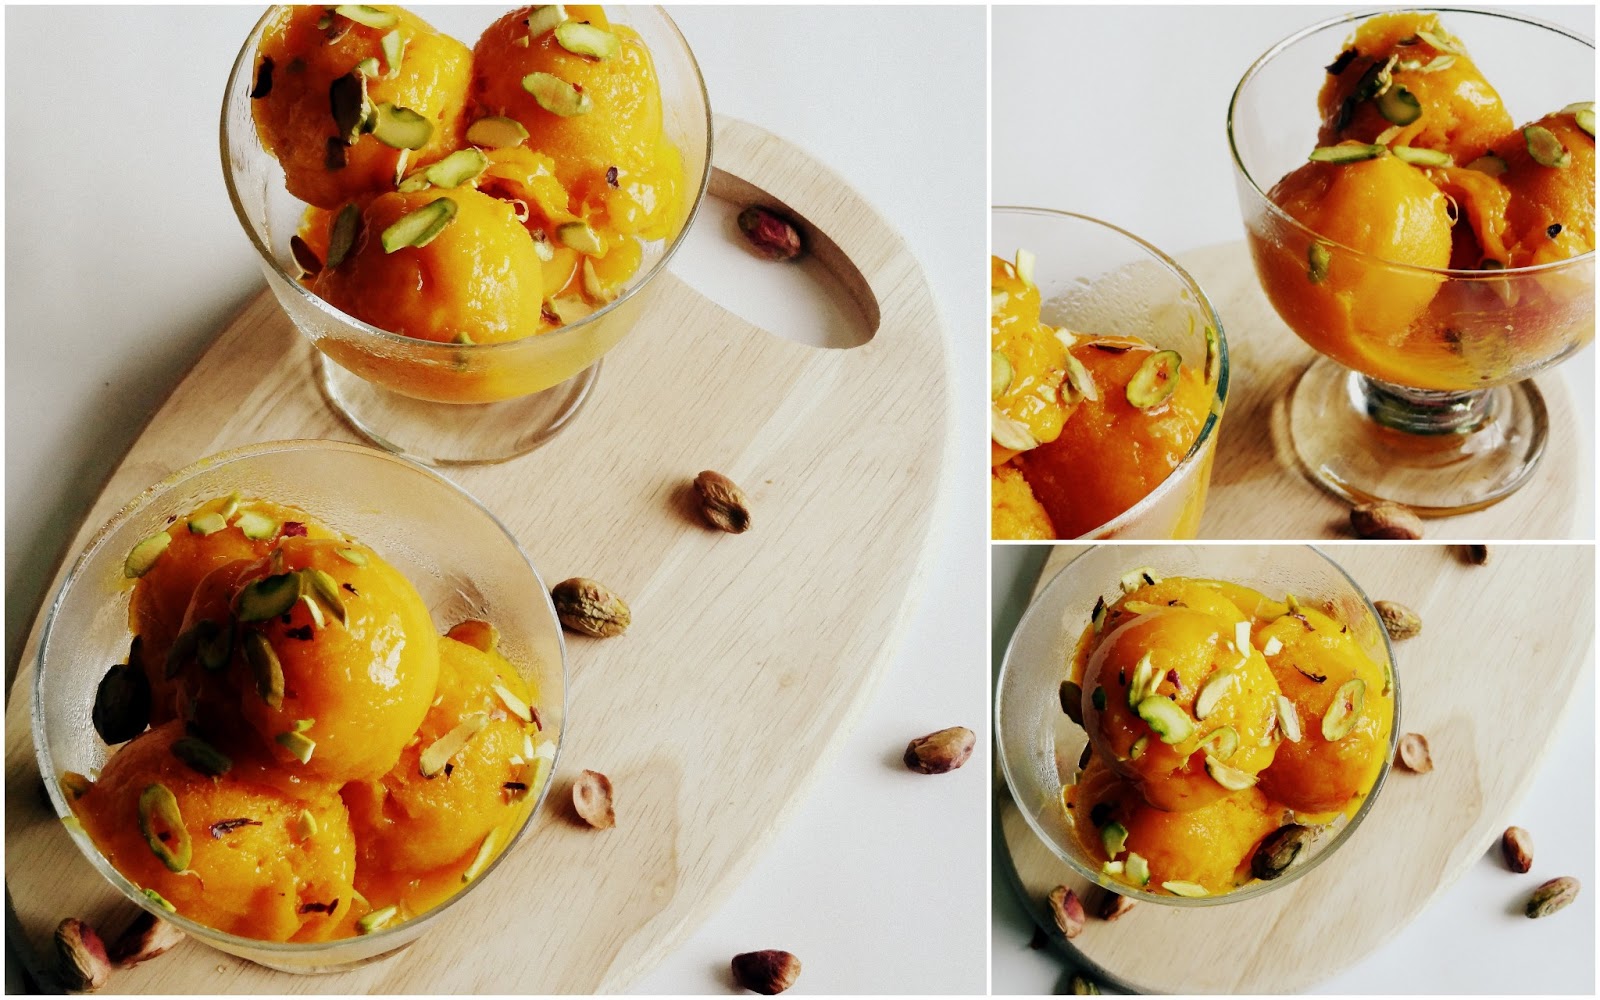
Mango Sorbet

Last week my brother-in-law got 2 boxes i.e. 2 dozen of Alphonso Mangoes, naturally ripened. The mangoes were so sweet with the perfect yellow colour that I decided to use them for something interesting. I thought of making some sorbet to combat the heat we have been witnessing as the summer is at its peak and we were all desperately waiting for the monsoon to hit. 


They don't say Mango is the King of all the fruits for nothing. This fruit has every  reason to be the favourite among all the fruits. Look at the colour, the texture or  the sweet taste of the fruit and anybody would fall for it. This sorbet allows you to enjoy the low fat version of a dessert and gives you a reason to smile happily in this scorching heat of Mumbai. And that the recipe is vegan, is a bonus! 


Mango Sorbet


Here's what you gonna need for Mango Sorbet:

2 large, ripe mangoes (I used Alphonsos)
2/3 cup Simple Syrup
4 tsp freshly squeezed lime juice, plus more to taste
1 tbsp dark rum

Simple Syrup
2/3 cup Sugar
2/3 cup water

Here's how you can make it:

Simple Syrup
  • In a saucepan, heat sugar and water until the sugar completely dissolves. Remove it from heat and let it cool completely at room temperature.
Mango Sorbet:
  • Peel the mangoes and cut the flesh away from the pit. 
  • Squeeze the mango pits hard over the blender to extract as much of the pulp and juice as possible.
  • Cut the flesh into chunks and put them in a blender with the cooled sugar syrup, lime juice and rum. 
  • Puree the mixture until smooth. 
  • Taste, then add more lime juice or rum if desired. 
A. Method using Ice Cream maker:
  • Chill the mixture thoroughly, then freeze it in your ice cream maker according to the manufacturer’s instructions.
  • Once sorbet is made, transfer into a freezer box, cover, and freeze.
B. Method when not using Ice Cream Maker:
  • Pour the mixture into a stainless steel pan (sorbets will freeze faster in stainless steel), cover with plastic wrap, and place in the freezer. 
  • When the sorbet is completely frozen (3 to 4 hours), remove from freezer and let stand at room temperature until partially thawed. 
  • Transfer the partially thawed sorbet to the food processor, and process for a few minutes (this step gives the sorbet its wonderful fluffy texture.) 
  • Place the sorbet back into the pan and refreeze for at least three hours, and up to several days.
Hope you would also like making this as much as I did!

Sunday, May 19, 2013

Karachi Bakery Style Homemade Fruit Cookies (Eggless)


One of the best baked things I have grown up eating are Karachi Bakery's  Fruit Cookies(the famous Hyderabad based Bakery). I had gone to this bakery as a kid with my Mom and bought 2 big boxes of these cookies and regretted later that I should have brought more boxes as these are so addictive. I would simply gorge on to the cookies until I would finish the last bit of the cookies from the box. Thanks to the supply chain these cookies are now available in almost every city in India and I can buy them whenever I want. Since I had started baking at home, I decided to give the Karachi Bakery style cookies a try.


I love the colour and sweetness that tutty fruity brings to the cookies and a little bit salty taste that comes from the salt added to the dough. To make these cookies rich, some chopped cashew nuts are also added to the batter. Prepare the log, freeze it for a couple of hours and you are done. Cut and bake the cookies.


Here's what you would need to make these Fruit Cookies:

115 gms/ 1/2 cup unsalted butter (at room temperature)
100 gms/ 1/2 cup caster sugar
1 tsp pure vanilla extract
1/4 tsp salt
100 gms/ 3/4 cup whole wheat flour
30 gms/ 1/4 cup all purpose flour
1/3 cup Tutti Fruity
2 tbsp chopped Cashew nuts

Here's how you can make it:

Preheat your oven to 160°C/ 325°F. Line two baking sheets with parchment paper.
  • In a large bowl of your stand mixer using paddle attachment or using hand mixer, cream butter and sugar until light and fluffy.
  • Add vanilla extract and mix it well. Scrap down the sides of the bowl as required.
  • Add salt and flour and mix it well until the dough starts to come together.
  • Add tutti-fruity and cashew nuts and form a soft dough. 
  • Make the dough into a log shape, cover it with a cling film and freeze it for at least a couple of hours to overnight. I kept my log overnight.
  • With the help of a serrated knife, cut the log into 1/2 inch wide slices. You may shape the cookies with your hands if it breaks.
  • Keep the cookie slices onto the baking tray leaving few inches gap between each other and bake for about 10-12 minutes until the cookies turn brown from sides. Turn the baking tray front to back half way through the baking. Cool completely on a wire rack.
These cookies are best to have at tea time or any time you want a sweet kick.;)

Hope you would also enjoy making this cake as much as I did!

Happy Baking!

Thursday, May 16, 2013

Nutella Fudgy Brownies


There are days when you crave for something sweet and you can't wait to whip up a cake or a batch of cup-cakes to satisfy your craving. One thing which could fulfill your craving in such situation would be having a spoonful of the rich and silky goodness of Nutella! Another thing which you can do is make these Nutella Fudgy Brownies which takes just 20 minutes in all to make, bake and take these brownies in your mouth to calm your taste buds. :)

This is one of the recipes which I made immediately once I saw it on Abby's blog here. Also, this was one of my bake items which got over within 5 minutes of coming out of my oven.


This recipe is made in one bowl using the smallest whisk you have available at home. All you need to do is dump everything in the bowl, mix and spoon it into the smallest size muffin/ cup-cake tin you have. Thats it! You are done. Isn't this the best recipe for you to start experimenting with baking? So what are we waiting for? Lets get straight to baking...


Here's what you would need to make Nutella Fudgy Brownies:

1/2 cup Nutella spread
1 large egg
5 tbsp all purpose flour
1/2 tsp pure vanilla extract
1/4 cup white chocolate chips


Here's how you will make them:

Preheat the oven to 350°F/ 180°C. Line a 6-cup cup cake pan with paper or foil liners.
  • Put the Nutella, egg and vanilla extract in a medium bowl and whisk until smooth and well blended. 
  • Add the flour and whisk until blended.
  • Using ice-cream scoop, spoon the batter into the prepared cup-cake tins (about 3/4 full) and sprinkle evenly with the chocolate chips.
  • Bake until a pick comes out with wet, gooey crumbs, about 12 minutes. 
  • Set on a rack to cool completely. Serve at room temperature.
Variations:
In place of the chocolate chips, switch in the following:
Chopped toasted hazelnuts     1/4 cup

Hope you would have also enjoy making these brownies as much as I did! So, don't forget to share your experiences.

Happy Baking!

Friday, April 5, 2013

Eggless Nutella Pinwheel Cookies


I love trying different types of cookies and gifting them to people. I think, these are the best gifting option as it can be stored for a long time, not too sweet hence a win-win situation if the person you gift is not a fan of sweets. Its also a great way to incorporate chocolate and satisfy your chocolate craving anytime you want without feeling too guilty.

I got one such opportunity when my sister in law was going to Bangalore to meet her elder sister. The elder sis-in-law wanted some Delights and I decided to make something which looks beautiful like her. To make that happen, I decided to use her favourite (and mine too!) Nutella. The richness of Nutella swirled into dough of wholewheat flour and butter makes the cookies ''Divine". Hence, presenting you Eggless Nutella Pinwheel Cookies.


Before that, I have to share the story of making these cookies. I made the rolled up the nutella spread cookies dough and kept it in the freezer overnight to harden so that they are ready to bake in the next morning when my sister-in-law had to catch the flight. But, the next morning I got so late in normal house chores that I got to baking these cookies only when there was just one hour left for her to check-in for the flight. She had left for office in the morning, hence I needed to bake it, pack it and leave for the airport which was about 15 kms from my home. I was under so much pressure that I was feeling like I was participating in some Masterchef competition. 

I utilised every single second in that hour and was just on time, like a minute before she had to check-in for the flight. Phew! As they say, All's well that ends well. My cookies reached safely to Bangalore and made an awesome tea time delight for my sweet sis-in-law. 


I adapted the recipe from The Purple Foodie, a great website by a young girl Shaheen Peerbhai from aamchi Mumbai and is currently based at Paris. I looked up to her recipes and aspire to win scholarship from Le Cordon Bleu like her some day. The recipe posted by her uses an egg, I omitted the egg and used a little milk to combine the dough as some in my family don't prefer eggs. It worked great!

Here's what you gonna need to make these Eggless Nutella Pinwheel Cookies:

125g / 1 stick butter, softened
½ cup sugar
1 tsp vanilla extract
1 heaped cup sifted flour (I replaced 1/2 heaped cup with wholewheat flour)
3 - 4 tbsp nutella (a little more won't harm anyone, I would love some more)
2-3 tablespoon, toasted, chopped hazelnuts

Here's how you can make it:


Preheat your oven to 180°C/ 350°F. Line two baking trays with parchment paper or grease it with some butter.


  • In the bowl of your stand mixer or in a large bowl using you hand mixer, cream butter and sugar until light and fluffy.
  • Add in vanilla extract and give it a good mix. Scrap down the sides as needed.
  • Sift in the flour and mix it until the dough is all combined together. Make a ball of the dough using your hands, wrap it with some cling film/ plastic wrap and keep it in the refrigerator for about half an hour to firm it up a little. This will facilitate rolling out the dough nicely.
  • Sprinkle some flour on your work surface and roll out the dough into a rectangle of ¼ inch thickness. Rotate the dough with your hands while rolling.
  • Spread a good amount of Nutella on the top surface and make sure to leave one finger space on all four sides. 
  • Sprinkle over the chopped hazelnuts and roll up the dough.
  • Freeze the roll for about 2 hours or upto over night before cutting the slices. I used dough cutter to cut the slices. This can be done with the help of a sharp knife as well.
                          
                                              Before                                                  After

  • Place the slices on a pre-lined baking sheet and bake for 12-14 minutes until the cookies are slightly brown at the edges. Rotate the sheet around half way through the baking. Shaheen suggests baking time will vary depending on how thick or thin you have cut them. Hence, look for the colour as a good indication. 


Now you are ready to enjoy these wonderful cookies.

Hope you would also enjoy making this cake as much as I did! Don't forget to share your experiences by way of comment on the blog or on FB! I would love to hear from you guys!

Happy Baking!